Written by Daniel Walton on 17th Sep 2026


Managing Director & Founder, OLPRO
Daniel founded OLPRO in 2011 and still leads its product design. He created the OLPRO Breeze inflatable system after watching too many campers wrestle with pole sleeves in the wind, and that fix-the-real-problem approach shapes everything the team builds and tests in-house.
If the wind makes your tent difficult to control, wait for conditions to improve or change your plans.
If it is safe to pitch, use a sheltered site, keep the tent low, secure the windward end first, close every door and raise the structure in the order given in the model instructions. Then use every required anchor point and guy line.
Our advice: there is no one safe wind-speed limit for every tent. The model, pitch and conditions all matter.
If strong wind makes the tent difficult to control, do not start pitching. Wait for conditions to improve, ask the campsite team about shelter or change your plans. If it is safe to continue, keep the tent low, secure the windward end first, close the doors and raise the structure in the order given in its instructions.
A good pitch starts before you open the bag. We recommend practising with your tent in calm weather, checking the forecast and choosing a sheltered spot. This guide takes you through securing the structure, spotting problems early and packing down safely.
Should You Pitch a Tent in High Winds?
Before you unpack, check that you can control the tent and that the ground will hold your pegs securely.
Wait or change plans if you cannot hold the fabric and frame under control, the pitch is exposed, branches or loose objects could fall or blow towards you, or a weather warning indicates conditions could affect the campsite. The Met Office camping guidance advises waiting for better conditions where possible because a partly erected tent is particularly vulnerable.
Continue carefully only when you can work without putting yourself or anyone nearby at risk. Use a sheltered pitch, get another adult to help with a large tent and keep loose bags, poles and panels secured as you work.
Leave the tent and use solid shelter if conditions deteriorate beyond what you can manage. Follow campsite instructions. A substantial building or hard-topped vehicle is the safer place during a thunderstorm; a tent does not protect you from lightning.
There is no single safe wind-speed limit for every tent. The tent's shape, size and condition, the ground and the strength of the gusts all matter. Use the forecast, weather warnings, campsite advice and your own tent's instructions together when deciding whether to pitch.
| Decision | What you can see | What to do |
|---|---|---|
| Pitch carefully | You can control the tent, the ground holds and the site has safe shelter. | Follow the model instructions with help and complete every anchor point. |
| Wait or relocate | The fabric is hard to hold, the pitch is exposed or objects could fall or blow towards you. | Keep the tent packed, ask the campsite team and wait for better conditions. |
| Leave the tent | The structure is deforming, anchors keep pulling out, debris is airborne or thunder is present. | Move people to a solid building or hard-topped vehicle and follow official and campsite advice. |
Use these signs alongside your tent's instructions, the forecast and campsite advice. Scroll sideways on mobile.
Before You Leave Home
Pitch your tent at home in calm weather before its first trip. Work through the instructions so you know which end faces the weather, how the poles or beams rise and where each guy line runs. It is much easier to learn the sequence without the wind pulling at the fabric.
Check the tent body, poles or air beams, valves, pump, guy lines, adjusters and attachment points. Replace damaged parts before the trip. Pack a mallet, peg puller, spare pegs suited to the ground and a repair kit appropriate to the model. Our guide to choosing tent pegs explains why one peg type does not suit every surface.
Check the local forecast before travelling and again before pitching. Look at gusts as well as average wind, and read any Met Office warning for the area. Conditions at an exposed coastal or hillside pitch can feel very different from those in a sheltered town forecast.
Practise the sequence
Pitch your tent at home in calm weather so you know the sequence before your trip.
Inspect the structure
Check fabric, poles or beams, valves, attachment points, lines and adjusters.
Match pegs to ground
Pack the right anchors, spares, a mallet and a peg puller.
Check gusts
Look beyond the average wind and read the forecast details.
Read warnings
Check official warnings before travel and again before pitching.
Know where to shelter
Know where the site's solid shelter is and keep vehicle access clear.
How to Choose a Safer Pitch
Use the campsite's allocated pitch and rules first. Where you have a choice, look for level, well-drained ground with natural shelter from a hedge, wall or low landform. The Camping and Caravanning Club's strong-wind guidance
also recommends staying clear of trees and free-standing objects that could fall or become airborne.
Avoid hilltops, ridges, open beaches and obvious wind channels between buildings or hedges. Avoid hollows that can collect rainwater. Check the ground before unpacking so you know whether the pegs you brought can hold securely.
Face the lower or narrower end of the tent into the wind, with doors facing away, unless your tent's instructions specify a different orientation. This reduces the area catching the gusts and helps stop wind blowing straight through an open door.
How to Pitch a Tent in High Winds
These steps apply to many family tents, but the order in your model instructions takes priority.
Keep it low, anchor the windward end, then raise it in the instructed order.
Prepare: put the pegs and mallet within reach before opening the tent bag.
Control: keep loose fabric folded and remove one part at a time.
Orient: place the correct end towards the wind and keep doors away from it.
Anchor: secure the designated windward points before raising the frame.
Close: shut doors and panels so the wind cannot fill the tent.
Raise: follow the product sequence and pressure limit without forcing parts.
Finish: secure every required point, tension evenly and complete a full walk-around.
- Prepare before opening the bag. Put the mallet and pegs within reach. Ask your helper to stand where you can communicate without shouting across the fabric.
- Keep every loose part controlled. Remove one item at a time and close the bag. Do not spread poles, packaging and accessories around the pitch.
- Lay out the footprint and tent in the correct direction. Keep the main fabric low and folded until you need each section.
- Secure the windward end first. Anchor the corners or designated first points without stretching the groundsheet out of shape.
- Close doors and panels. This stops a gust filling the tent and lets you set the intended tension. Keep required vents open once the tent is fully pitched.
- Raise the structure in the instructed order. Push sectional poles through sleeves rather than pulling them. Inflate air beams only to the pressure stated for the model.
- Secure the remaining anchor points. Work steadily around the tent so the fabric sits evenly and the frame is not twisted.
- Use every required guy line. Follow the direction of the seams or the layout shown in the instructions. Tension them firmly and evenly without distorting the tent.
- Finish with a full check. Confirm that pegs are holding, lines are visible and doors still open and close without strain.
Never wrap a guy line around a tree, vehicle or object unless the instructions and campsite explicitly allow it. Do not add lines to fabric loops that are not designed as load-bearing attachment points.
What Changes for Dome, Tunnel and Inflatable Tents?
| Tent type | Control first | Raise it | Avoid |
|---|---|---|---|
| Dome | Keep the body low and anchor it. | Build the crossed pole structure as instructed. | Assuming self-supporting means wind-secure. |
| Tunnel | Secure the aerodynamic end towards the wind. | Raise the hoops in the specified order. | Leaving the broad side exposed while half raised. |
| Inflatable | Secure the base and control loose fabric. | Inflate in sequence to the stated pressure. | Relying on flexible beams without securing the base and guy lines. |
The exact model instructions override this general comparison. Scroll sideways on mobile.
Dome tents: Keep the body low while assembling the crossed pole structure. A dome may appear to stand without anchors, but it still needs securing before the wind can move it.
Tunnel tents: Orientation and end-to-end tension matter. Put the aerodynamic end towards the wind, secure that end first and raise each hoop in the order shown in the instructions. Do not let the broad side take the full force while the structure is only partly raised.
Inflatable tents: Secure the base before inflation and control the fabric as the beams rise. Use the supplied or compatible pump, stop at the model's stated pressure and close each valve as directed. Air beams can flex in gusts, but that does not make an inflatable tent storm-proof.
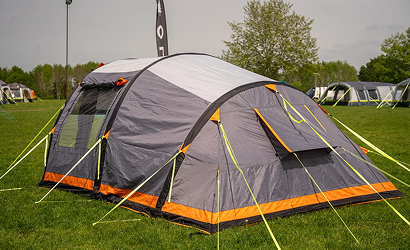
The OLPRO Breeze® air beams make inflation straightforward, but the anchor points and guy lines still need the same care as a poled tent. Work around the whole tent before settling in: the frame, fabric and anchors need to share the load evenly.
What to Check After the Tent Is Up
Walk around the tent as soon as it is pitched and after any notable change in wind or rain. Look for loose pegs, slack or over-tight lines, twisted poles, soft air beams and fabric that is flapping or collecting water. Correct small changes before they place more load on one point.
Wet ground can reduce a peg's hold. Rain can also change fabric tension, while temperature changes can alter air-beam pressure. Follow the tent instructions when adjusting either lines or pressure.
Keep all designed vents working. Closing a tent tightly against the weather does not remove the moisture produced by breathing, wet clothing and cooking. Our guide to tent and awning condensation explains how ventilation and moisture control work together.
Secure chairs, tables and other loose equipment before stronger weather arrives. Keep flames and cooking appliances away from the tent and follow campsite fire rules.
If the tent becomes difficult to control, poles or beams deform unusually, pegs repeatedly pull loose or debris starts blowing across the site, follow campsite advice and move people to solid shelter. Do not wait inside a failing tent to see whether it recovers.
How to Pack a Tent Down in Wind
If stronger weather is forecast, pack down while you can still work safely. Do not leave the decision until the structure is already failing.
- Empty the tent and move people, pets and loose equipment to safety.
- Close doors and panels so the tent cannot fill like a sail.
- Keep the windward anchors in place while you remove guy lines and other pegs in the reverse order recommended by the instructions.
- Lower poles or deflate beams in a controlled sequence. Keep hold of the fabric throughout.
- Fold or roll the tent towards its open valves where required, then put it straight into the bag or vehicle.
- Count the poles, pump parts and pegs before leaving the pitch.
Two people make a windy pack-down safer and easier. One can control the tent while the other removes or resets each anchor. Stop and seek help if the fabric or frame begins to pull either person off balance.
If the tent is wet, pack it for transport and dry it completely as soon as conditions allow at home. Do not store wet fabric in a closed bag.
1. Control
Empty the tent, close doors and keep the windward anchors until the frame is ready to lower.
2. Lower
Reverse the instructed sequence, keep hold of the fabric and account for every part.
3. Dry
If packed wet, unpack as soon as conditions allow and dry the flysheet, inner, seams and bag completely.
4. Inspect
Clean and repair by the model instructions, then store everything dry in a cool place.
How to Clean, Reproof and Store Your Tent
Brush off loose, dry dirt before cleaning your tent. Use lukewarm water and, where needed, a tent cleaner suitable for its fabric and coating. Check the care instructions first. Do not use household detergent, bleach, a washing machine, pressure washer or tumble dryer: these can damage the fabric or its protective treatment.
If clean water stops beading on the outer fabric, check the care instructions for a suitable reproofing treatment. Check the seams and fabric for damage too: reproofing will not repair a tear or failed seam. The OLPRO waterproof tent ratings guide explains what ratings such as 3000mm and 5000mm tell you about the fabric's resistance to water.
Allow the flysheet, inner, seams, pockets and bag to dry fully. Store the tent in a cool, dry place away from direct sunlight, pests and sharp objects. Do not leave weight resting on poles, valves or air beams. Before the next trip, pitch it at home and inspect the fabric, frame, lines, pegs, valves and zips again.
Repair small damage before your next trip, using the right method for the fabric and frame. If you need help choosing a spare part or repair kit, contact our team with your tent's model name so we can point you in the right direction.
Questions answered
Choose a tent you can practise, pitch and care for with confidence.
Find the right size and layout in our tent range, with a frame and packed weight you can manage comfortably. Practise at home before your first trip so you arrive knowing your kit.
Browse OLPRO tents